Aversion to salt is what got me interested in drying my own food. Nancy, my late wife, had high blood pressure, and we lived on a salt-free diet. I spend lots of time in the back country and need lightweight food. As I became accustomed to a salt-free diet, commercially prepared food became untenable. Or course, it’s not only salt that is added to commercially dried food; there are many other additives that may not sit well depending on allergies and other ailments you might have. These days, I make dehydrated food ahead of all my back country adventures.
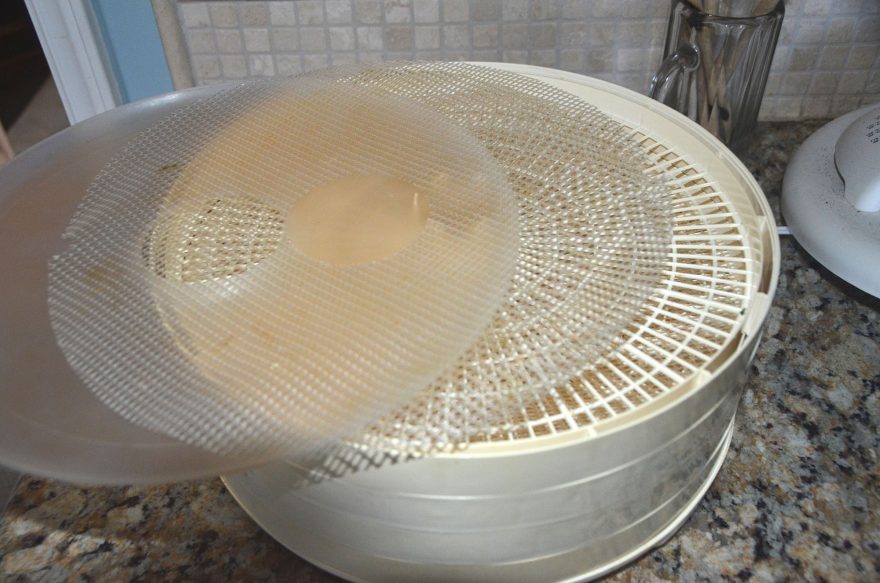
I started by buying a small dehydrator (there are lots available). They work by passing warm air over food items. Get one with both a fan and a means to vary the temperature of the air. Mine has four separate round trays, a little over 14 inches in diameter. Each tray has a grid-like bottom. In addition, supplemental liners for the tray provide smaller openings, and one is solid (more about that in a minute).
To prepare items for drying, you need to pre-cook them. For successful drying, the items need to be small. For chili mac, for example, I use ground beef. For shrimp creole and split pea soup with ham, I run cooked shrimp or cooked ham through the slicer on a food processor. For three bean salad, I soak the dried beans from the grocery, cook the beans until soft, then dry them in the dehydrator. For soups, cook up your favorite, then use the solid liner to the dehydrator tray and spread the soup on the liner. What results is called a leather — a dried, flat, almost rubbery layer. Spaghetti sauce can be dried the same way. Then I run the leather through the food processor.
Fresh food works better for drying than frozen, and frozen works better than canned.
A few days ago my sister said I was a tightwad. (When challenged, she denied it.) A further advantage of home-drying your food for backcounty travel is that it’s cheap! By doing this, I generally save about half the cost compared to commercially dried food.
Snacks from dried fruits are great. Apples, pears and bananas work great. Your results will not be the same color as commercially dried items. Why? Commercially dried foods are often chemically dyed to make them look “natural.”
Once I have my food dried, I put the result in a vacuum bag and store the result in the freezer until I’m ready to travel. In a few days, I’ll start preparing meals for a party of four making an 11-day wilderness trip to Quetico Park. All the evening meals will be done this way.
Rehydrating home-dried food takes a little longer than rehydrating commercially prepared foods. Allow for it.
Admittedly, this essay only begins to give you a small taste about drying food for back country travel. Additional useful information is Mary Bell’s Complete Dehydrator Cookbook and The Food Dehydrating Bible by Brett L. Markham.
Tim Mead is an outdoor writer with 35 years experience. His articles and photos have appeared in national, regional and state magazines. He is Past President of the Southeastern Outdoor Press Association and current President of the Outdoor Writers Association of America.
 Your Privacy Choices

