Image by Lukas Gojda, Shutterstock
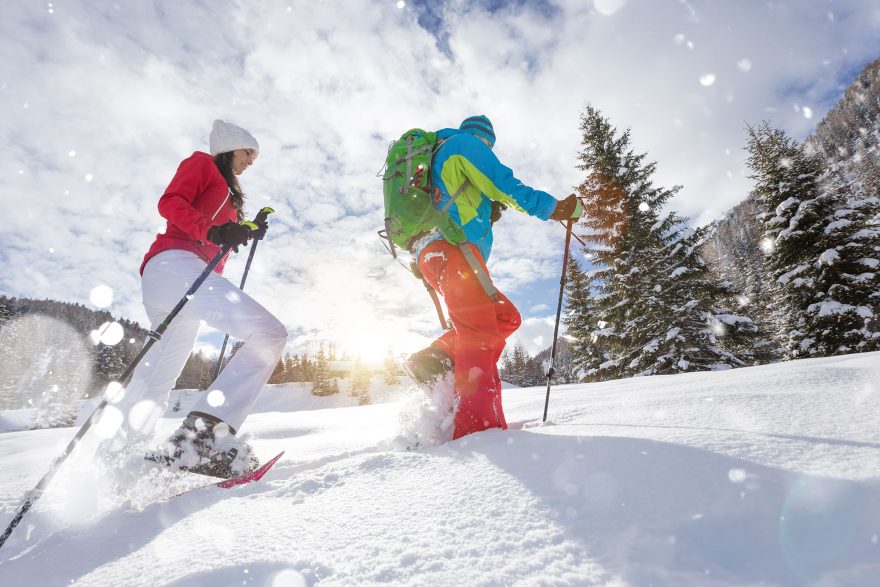
Backcountry snowshoeing is a great way to get outside and play in the snow during the winter months. It’s also a good way to get some fresh air and get in an aerobic workout. And, since you’re lifting your legs higher than casual walking or running, you’re probably burning more calories than you think.
Snowshoeing is also a lot of fun and somewhat easy to do. Once you get your snowshoes on your feet, it’s pretty much just like walking– but with bigger shoes. Since you’re walking a little wider and higher than normal, the feeling of snowshoeing can take a little getting used to. But if you have the right snowshoes for your height and weight, it should feel effortless and natural — especially in freshly fallen snow.
» Learn more about how to choose the right snowshoes for beginners here.
Snowshoeing in the backcountry is also an affordable winter activity. If you already have winter clothing (for layering) and snow boots, you’ll just need a set of snowshoes and hiking poles (optional) for stability while out adventuring. If you’re heading out on public land or simply snowshoeing on your own property, you won’t have any trail pass fees or lift ticket fees like you would with skiing.
Here are six beginner tips to help you be successful snowshoeing in the backcountry.
1. Know the Terrain and Snow Conditions
For snowshoeing, you’ll want to pay attention the terrain, snow type and snow depths before you venture out. Look for freshly fallen snow, commonly referred to as “powder.” That’s the best type of snow for backcountry snowshoeing. Ideally, you’ll want to go snowshoeing in snow depths of 10 to 12 inches or more (when you start to sink in the snow). Having the right depth and the right type of snow increases your success.
Image by Sander van der Werf, Shutterstock
You won’t need snowshoes when there’s a lot of ice and hard-packed snow or snow depths under 10 inches where you don’t sink in. Those conditions are best for the use of snow cleats or crampons to prevent you from slipping.
You’ll also want to know what the terrain is like in the backcountry location you choose so you know if it fits your skill level. Are there hills? Steep mountainsides? Does the landscape have a high number of down trees to climb? Consider what you’re comfortable with and choose a backcountry terrain that’s right for you.
2. Get the Right Snowshoes for You
Having the right snowshoes for your shoe size and weight can increase your success and enjoyment in the backcountry. Do your research before buying. A recreational or “trail” snowshoe is typically ideal for beginners as they allow you to easily navigate trails on flat or rolling hills.
Since snowshoes are built to allow you to float on the snow, you’ll want to make sure you have the right fit. Men’s and women’s snowshoes are built differently. For example, snowshoes for women usually have a narrower gait to accommodate for shorter strides.
You’ll also want to consider your boot size over your typical shoe size when choosing a snowshoe to make sure they’ll fit. Common snowshoe sizes are 25, 30 and 36 inches.
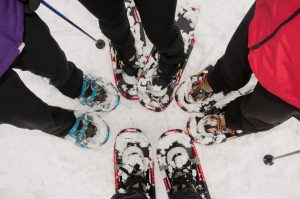
Image by Debbie Galbraith, Shutterstock
Another thing to consider is the weight the snowshoes can handle. Consider how much you weigh plus the weight of your coat, base layers, boots and other gear. For example, if you’ll be carrying a day pack with water, food and extra gear, make sure to accommodate for that. If your boots each weigh 2 pounds, factor that in too.
If you don’t have snowshoes that can support your weight, you’ll find yourself sinking too deep into the snow and falling or sliding — making your backcountry snowshoeing experience difficult.
3. Dress in Layers
Like any outdoor winter activity, make sure to wear layers of clothing when you’re out snowshoeing — especially if you’re going long distances or trekking on rolling terrain. Your body will heat up while doing aerobic activity, so you’ll want to be able to lighten the load if needed.
Image by michelangeloop, Shutterstock
Keep in mind, too, that 40 degrees feels a lot different depending on where you’re snowshoeing. A 40-degree day in the Midwest can feel much colder than a 40-degree day in Montana or Colorado. So, know what layers you need to accommodate you.
4. Learn Basic Snowshoeing Terms and Techniques
You’ll want to learn how to navigate in your snowshoes and be prepared for different scenarios in the backcountry. Here are some common techniques to learn.
Breaking trail
When you break trail, you make tracks in snow that’s untouched. The depth of snow determines how hard this will be for you. If the snow is deep — more than 12 inches — you’ll have to lift your feet higher and slower than you would on a trail that’s already groomed by other snowshoers.
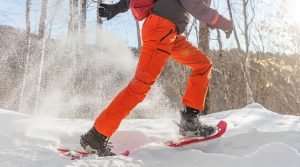
Image by Maridav, Shutterstock
Stride
Stride is simply walking as you would without snowshoes. Although you may have a wider or higher step, your stride is the way you walk through snow.
Picking yourself up
You’re bound to fall in the snow while you’re out snowshoeing. If you do fall, one way to get up is to roll over onto your front and put one knee up to push yourself up into a half-kneeling position. Then, you’ll be able to raise yourself up to a standing position by using your knee as a brace for your arm or hand. If you have poles, you can use them to help you stand.
Ascending
When you’re going up hills, you’ll want to put more emphasis on your toes or sides of your snowshoes to get more traction in the snow. There are different techniques to going up hills, so research this term even more if you’ll be ascending hills.
Descending
When you’re going down hills, you’ll want to put more emphasis on your heels to gain more traction. This allows your heels to dig into the snow more for increased stability.
Stamping and edging
If you’re out in freshly fallen snow, you’ll want to build steps. You do this by stamping and edging. Stamping is just like it sounds. You push your snowshoe down like a stamp to create a solid platform. Edging is when you plant the side of your snowshoe edgewise into the snow, pause and then push your weight onto the outside edge of the show to create a solid step in the snow.
5. Consider Using Trekking Poles
Having trekking poles can give you better balance and help you get an upper body workout while you’re out in the backcountry. This can be great for beginners.
Trekking (or hiking) poles telescope down to make them easy to pack away. You can also use ski poles if you already have them, just make sure they are the right length for you.
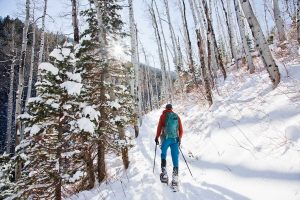
Image by Devansphotography, Shutterstock
Some people prefer ski poles as they have a basket at the bottom to prevent them from sinking into the snow. You can also get those baskets for your trekking poles to make them user-friendly in the snow. Overall, trekking poles will give you better balance while you’re out snowshoeing to keep your falls and slips to a minimum.
6. Learn Basic Snowshoe Anatomy
Although there are a variety of different snowshoes on the market, most snowshoes have basic anatomy. Here are some of the most common terms you should know when you’re just beginning.
Bindings
Your snowshoe bindings hold your boot or walking shoe to the snowshoe.
Frame
The frame of your snowshoe is the outside outline or circumference
Decking
The decking is the flat surface within the snowshoe frame.
Heel lift
Your snowshoe heel lift is the bar underneath the heel of your boot or walking shoe that helps give you stability when you’re ascending hills.
Crampons
The crampons on your snowshoes are the little teeth-like grips on the bottom that give you additional traction.
Traction system
The snowshoe traction system is the way your snowshoe helps to limit slipping in the snow. On the bottom of your snowshoe, you can see what type of traction system you have by the way the crampons are configured.
Suzanne Downing is an outdoor writer and photographer in Montana with an environmental science journalism background. Her work can be found in Outdoors Unlimited, Bugle Magazine, Missoulian, Byline Magazine, Communique, MTPR online, UM Native News, National Wildlife Federation campaigns and more.
 Your Privacy Choices
 The
The