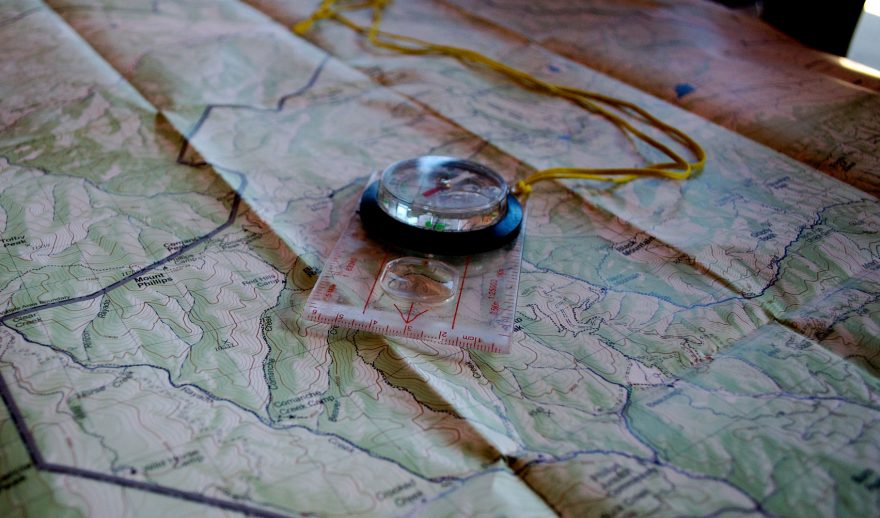
A compass is an amazing tool to have — and there is much that can be gleaned with a compass alone — but its value is amplified when used in conjunction with an accurate and detailed map. Insert any cliché you’d like (“goes together like peas and carrots”), the fact remains that pairing a map with a compass is a great combination in the backcountry, especially when you have the skills to use them together — to know where you are and where you’re headed.
This piece is the sixth (and last) in a series of articles intended to shed some light on compass usage in wilderness situations. While this tool is over a thousand years old, it is still a handy item to master to keep from getting lost. This series has covered the following discussions: (1) Compass Selection; (2) Using an Orienteering Compass; (3) Cell Compass Apps; (4) Declination; (5) Map Reading; (6) Map and Compass.
Part 6: Map & Compass
This article introduces the techniques of using the two powerful navigational tools together: a map and a compass. It is written for an orienteering-style compass accompanied by most any type of map that at least includes a north arrow.
Orienting Map
The process of getting the map to align to the real world is called orienting a map. This makes it easier to correlate what you see outside with the symbols on a map and feel more comfortable about knowing your current location. There are two ways to orient the map. One way is to find an obvious feature for which you can see the symbol(s) on the map (e.g., a road, powerline, creek, etc.). Then rotate the map until the symbol for the feature is aligned with the real-world feature. The rest of the features should line up in the direction and at the distance indicated by the map from your location. The challenge of this technique is to know exactly and correctly which symbol on the map represents the actual feature.
The second way to orient a map requires a compass and the knowledge of declination in your area (See my previous article on Declination), or at least on the map. If the map has a magnetic north arrow, simply place the side edge of the compass along that arrow, then turn the map and the whole compass together until the north end of the compass needle is aligned with, or parallel to, the map’s magnetic north arrow.
If there is no indication of magnetic north on your map, then an approximate orientation is better than none. That can be achieved by placing the side edge of the compass along the side edge of the map (or in line with any north arrow that may appear on the map) and turning them both together until the north arrow on the compass is pointing towards the top of the map.
Determining a Bearing
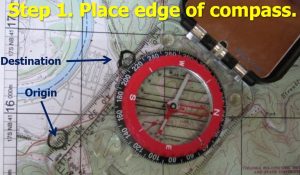
The most common use of combining a compass and a map is to figure out what direction (and distance) is needed to travel to get from where you are to where you want to be. This involves determining a magnetic bearing from two points on a map. If you are at point A (origin) and want to go to point B (destination), here is a way to determine that bearing:
The first step is to place the compass on the map, ensuring that the direction of travel arrow is pointing from the origin to the destination.

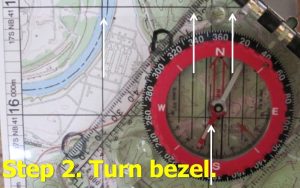
Step 2 is to turn the bezel on the compass until the orienting lines are parallel to the north/south orientation of the map. That orientation may be along one side of the map or, if there is a coordinate system shown on the map, it may be shown as grid lines. Ensure that north on the compass bezel is also pointing up towards north on the map.
Maps are usually made so that the top of the map is oriented towards geographic north. There are certainly exceptions to this, such as popular trail maps (e.g., Appalachian Trail), that are oriented in ways to maximize the length of the trail on the map.

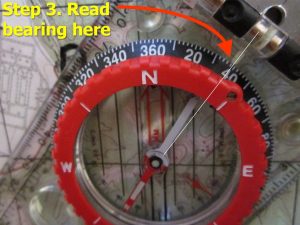
The third and final step in this process is to read the bearing on the compass. That is done where the direction of travel arrow or another marker intersects the bezel. In the photographed example, the bearing is 39 degrees.

The process above provides a grid or map bearing, but that is NOT what you will need to follow with your compass (unless you are at a location where the declination is zero). You will need to determine a magnetic bearing. Getting an accurate magnetic bearing from one point to another on a map requires compensating for declination.
If you have a compass that is preset for declination in your area, then the bearing that is shown on the bezel after the three-step process is, in fact, a magnetic bearing. If you do not have a compass that is preset for declination in your area, you will need to add or subtract the declination. Which you need to do depends on the aspect of declination in your area. If declination is to the west, you add the declination to the grid bearing to get your magnetic bearing. If declination is to the east, you subtract the declination from the grid bearing to get the magnetic bearing.
Once the magnetic bearing is determined, you will need to enter that on the compass bezel. With the magnetic bearing entered on the compass, turn the compass until red fred is in the shed or the dog is in the doghouse. Those latter phrases are just a couple of several euphemisms for turning the compass until the north edge of the needle is within the orienting marker (a red “shed” printed with the orienting lines on the bottom of the bezel in the pictured compass). You are now ready to follow the direction in which the compass points (See previous article on Using an Orienteering Compass).
Hopefully, these articles have provided useful information. Many thanks to Melissa Weeks for skillfully editing this series. We appreciate the opportunity to offer these, and wish you safe travels.
Rob Speiden is a professional search and rescue volunteer who has participated in over 330 searches since 1993. He teaches land navigation, tracking and other SAR classes for both the Virginia Department of Emergency Management and his own Natural Awareness Tracking School. Rob has written two books on tracking humans for SAR: “Foundations for Awareness, Signcutting and Tracking” and “Tracker Training.” More information about Rob’s books and classes can be found at www.trackingschool.com.
 Your Privacy Choices