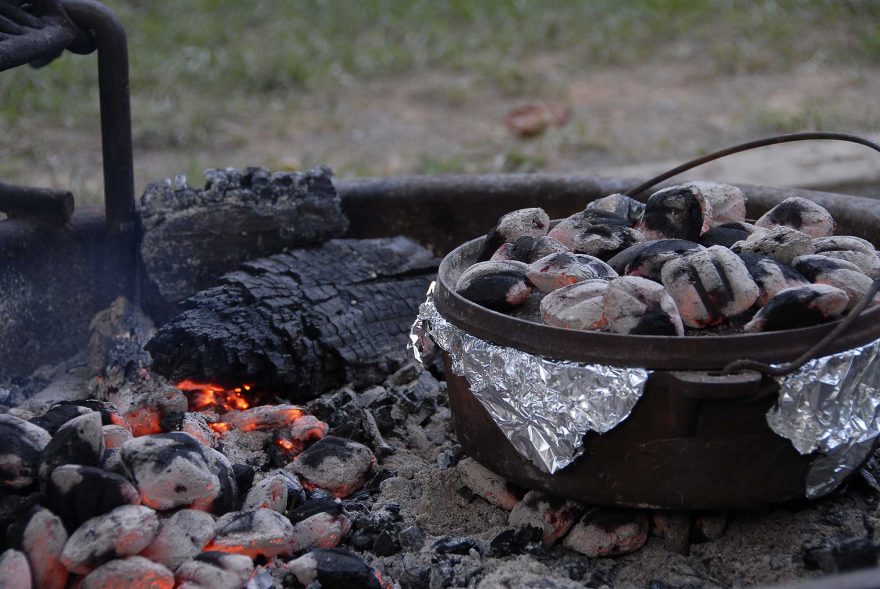
If you’ve ever had a hearty hot meal made in a Dutch oven over live coals or embers from a campfire, you probably remember it — and chances are you enjoyed it. A Dutch oven is a big metal pot (usually cast iron) used for cooking in an oven or by surrounding the pot with hot coals. A Dutch oven for camping has a lid, a handle and three legs on the bottom with enough room for coals to sit underneath.
A Dutch oven is such a versatile piece of camp cooking equipment. Since you can simmer, fry, bake and steam your meals, you can make more meals than you could with a traditional campfire stove (or a pot and pan over a fire). And you’ll find that those recipes that are impossible to cook at camp are now entirely do-able. And maybe it’s just me, but food cooked at camp usually seems to taste so much better than food made at home in a traditional household oven.
But cooking with a Dutch oven takes some practice. You may find that you’ll need to do a lot of experimentation when it comes to your fire’s heat levels, coal ratios, etc., but once you figure out the heat levels, you’ll be a pro in no time.
Another perk to cooking with a Dutch oven is that the process is slower. It’s when cooking becomes an “event” rather than a chore. And you can involve a lot of people in the cooking process. I’ve found that Dutch oven cooking is a great way to spend quality time at the campfire. It’s great for family or group camping since you can delegate different tasks and make casserole-style meals.

There are a lot of Dutch ovens to choose from and it can be overwhelming searching for a Dutch oven that will suit your cooking needs at camp. I recommend using a heavy-duty cast iron Dutch oven (it’s been my only experience over decades of camping). A cast iron Dutch oven will cook your meal well, retain heat for a long time (cast iron is a good heat conductor), hold a good portion of food and last you a long time — maybe even a lifetime if you take care of it. The only drawback is that cast iron is heavy.
If you’re new to Dutch oven cooking, watch some primer videos online, read about how to cook with a Dutch oven, take your time learning and stay with it. It does get easier. With these easy and delicious Dutch oven recipes, you’ll gain confidence and enjoy some hearty camp meals in the process.
What you’ll need
- A Dutch oven
- A bag of coals or briquettes
- A long pair of tongs (to move your coals)
- A pair of heat resistant gloves
- A lid lifter
- A small broom (to brush the ash off your lid)
Dutch ovens
Camp Chef Classic 10” Deep Dutch oven
This Camp Chef classic Dutch oven comes pre-seasoned, which means you can use it right away without any preparation on your part like other cast iron products that need oiled and cooked to be seasoned. It holds 5 quarts, which can serve 4 to 8 people and is a heavy-duty cast iron with a lid that weights in at 15 pounds. This Dutch oven also has a flanged lid for placing your coals on top and a built-in thermometer notch.
Lodge Deep Dutch 8 Quart Camp Dutch oven
This Lodge Dutch oven also has a flanged lid to hold your coals and the lid doubles as a griddle. It comes pre-seasoned without synthetic chemicals — just soy based vegetable oil. This Dutch oven is made in the USA in South Pittsburg, Tennessee, and Lodge has been manufacturing them since 1896. This Dutch oven is built to last you for many years.

Coals or briquettes
Briquettes are manufactured wood by-products compressed with additives to help them burn consistently. Coals are lump charcoal. A good rule of thumb recommended by Camp Chef is to “guesstimate” how many coals or briquettes you’ll need by taking the size of your lid and multiplying it by two. Reliable brands for your coals or briquettes are Kingsford, Royal Oak or Jealous Devil.
Tongs
You’ll need a long pair of tongs like the Lodge 16” inch stainless steel tongs or the Camp Chef 5 piece all purpose chef set with tongs included along with a spatula, spoon, knife and a carrying case. This will allow you to easily move your coals.
Heat-resistant gloves
Any gloves (or oven mitts) will work as long as they’re high heat like the tribal cooking silicone oven mitts or Camp Chef heatguard gloves.
Dutch oven Lid lifter
Since you’ll most likely be rotating your Dutch oven lid a quarter turn about every 15 minutes to make sure your food heats evenly, you’ll want an easy way to lift the lid. You can use your heat resistant gloves for this, but it’s much easier to keep your distance and move the lid easily with an actual Dutch oven lid lifter. (It’s a game changer once you use one — especially if your kids want to help.) I recommend the Stanbroil 15” camp professional cast iron lid lifter or the Camp Chef Dutch oven 22” lid lifter.
A small broom
You’ll want to brush off the ash from the lid before you remove the lid to prevent the ash from falling into your food. Any small whisk broom will work like this 13.5” small whisk broom.
The Dutch Oven Recipes
These are my five favorite and varied Dutch oven recipes, which have served me well in the backcountry. We’ve listed the ingredients here, and we encourage you to click the links with each one that looks yummy to you to get a full description of how to prepare the meal.
Pulled BBQ Chicken
The BBQ pulled chicken is really easy for this recipe. Just give it plenty of time to simmer at low heat, and the chicken breasts will pull apart easily. Watch the salt, especially if you’re using chicken stock with sodium in it or working from a powdered base. Best to go light and work up to your taste by adding salt later as needed. Serves: 8
Ingredients
- 4 skinless, boneless chicken breasts
- 1 tbsp olive oil
- ½ onion, chopped
- 2-3 garlic cloves, minced
- 1½ cups barbecue sauce
- 1 tsp hot sauce
- ½ cup chicken broth
- 1 tsp salt
- 2 tsp paprika
- 2 tsp black pepper
- 12 buns
For the complete recipe and directions on how to prepare this meal, see the original post at: 50 Campfires
Dutch oven biscuits and gravy
Biscuits and gravy can be a great “breakfast for dinner” at camp or a nice hearty breakfast in the morning. Serves: 6
Ingredients
- 1 package Pillsbury Grands Biscuits
- 1 tbsp Oil
- 1 lb pork sausage, crumbled
- ¼ cup flour
- 2½ cups milk
- ½ tsp Onion powder
- ⅓ tsp Thyme
- 1 tsp pepper
- ⅓ tsp salt
For the complete recipe and directions on how to prepare this meal, see the original post at: 50Campfires
7 layer Dutch oven country breakfast
If you want something that’s ideal for those early mornings when you need to warm up and get your body going. Serving size: 6
Ingredients
- 32 oz Ground Sausage – 2 small packages
- 30 oz Frozen Shredded potatoes
- 12 eggs
- 2 Cups shredded cheddar cheese
- 1 can biscuit dough or homemade biscuit mix
- salt and pepper to taste
For the complete recipe and directions on how to prepare this meal, see the original post at: HappyMoneySaver
Cake and berry campfire cobbler
Perfect for those of you with a sweet tooth! Serving size: 12
Ingredients
- 2 cans (21 oz each) raspberry pie filling
- ½ cup canola oil
- 1 package yellow cake mix (regular size)
- 101/4 cups water
- Vanilla ice cream (optional – ideal if you’re RV camping)
For the complete recipe and directions on how to prepare this meal, see the original post at: Taste of Home
Root beer apple baked beans
OK, this may sound a bit crazy to mix root beer with apples and beans, but it’s actually a great hearty combination when you’re camping. Serving size: 12
Ingredients
- 6 thick-slices of bacon stripes, chopped
- 4 cans (16 ounces each) baked beans
- 1 can (21 ounces) apple pie filling
- 1 can (12 ounces) root beer
- 1 teaspoon ground ancho chili pepper (optional)
- 1 cup shredded smoked cheddar cheese
For the complete recipe and directions on how to prepare this meal, see the original post at: Taste of Home

Suzanne Downing is an outdoor writer and photographer in Montana with an environmental science journalism background. Her work can be found in Outdoors Unlimited, Bugle Magazine, Missoulian, Byline Magazine, Communique, MTPR online, UM Native News, National Wildlife Federation campaigns and more.
 Your Privacy Choices