You can save yourself a lot of expense and headaches by doing some of the regular maintenance to your ATV on your own. One of the easiest things you can do is to change your oil regularly. It is a vital part of the maintenance routine and if you don’t know how to do it, don’t worry. It’s not that hard to learn how to change your own oil.
Knowing Where to Start
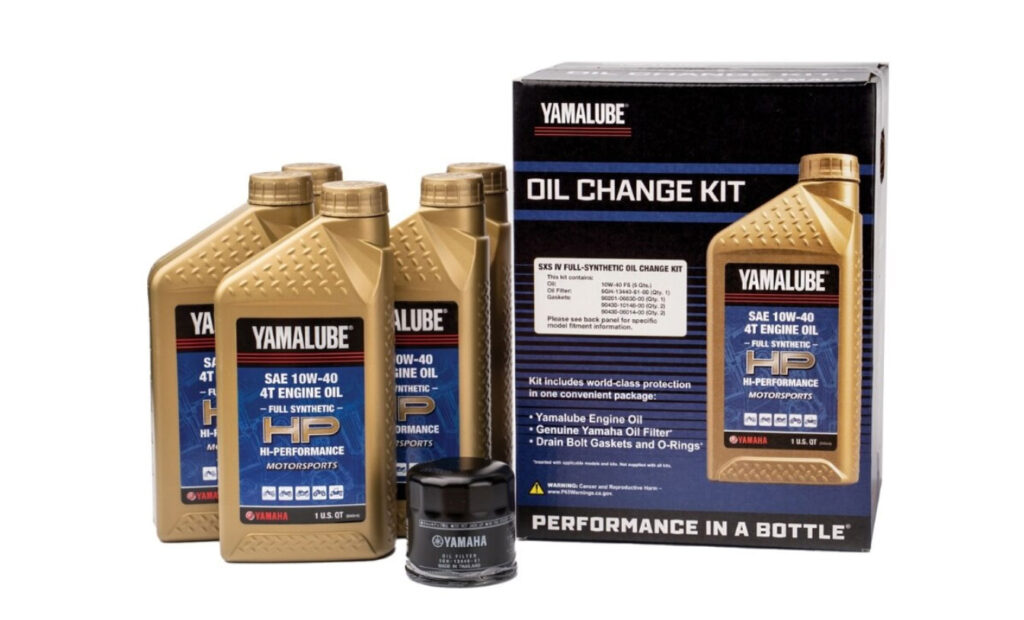
If you have never changed your own oil before in your ATV or Sde-by-Side (SxS), don’t worry. It’s not too hard to do. In fact, it is likely as easy, if not easier, than doing so in your car or truck. There are a few things you need to know before you get started, and this information can be found in your owner’s manual. You need to know exactly what oil you need by the weight, and the recommended type for your specific machine. Of course, it makes it easier that the manufacturers all produce their own line of oils. Yamaha offers their specialized Yamalube brand, which you can confidently rely on. Developed, tested, and formulated by Yamaha engineers, Yamalube is tailored to not only meet but also surpass the distinctive demands, operational traits, and applications of powersports products.
There are several significant advantages to utilizing a product such as Yamalube in your ATV or SxS. Firstly, you can be confident that you are using the correct and high-quality product. Additionally, the pricing is competitive compared to aftermarket alternatives, which might not adhere to the same stringent standards as a manufacturer’s oil.
You also need to know the location of the drain plug, as well as the location of the oil filter. Usually the drain plug is pretty easy to find on the bottom of the machine. Even if you have skid plates on the bottom for protection, chances are good that there is an access hole to reach the drain plug. Finding the oil filter may be a little trickier, and gaining access to it for replacement may require some extra thought on your part. For the most part, ATVs and SxS models have easy-to-reach oil filters, so don’t fret too much.
Be Prepared
Now that you know what you need, get the right amounts of products to do the oil change. Always consult your owner’s manual for precise guidance, but, for instance, a Yamaha Grizzly 700 ATV typically requires slightly under three quarts of Yamalube 10w40 oil, contingent upon the prevailing weather conditions during operation. It’s worth noting nearly all leading ATV manufacturers endorse the use of fully-synthetic oil for their engines. This practice is highly advisable given ATV engines generally operate at higher temperatures and endure more rigorous workloads compared to typical automobile engines. We have found it to be easier to buy enough stuff to change your own oil more than once. We often buy oil by the case, just to have it handy. Of course, not having it gives us an excuse to go to the dealership, but then we usually come back with more than just the oil and filters we went to get.
You will also need a new oil filter. Again, get at least two at one time. It is also a good idea to have a spare oil drain plug and washers on hand just in case you have an accident and drop the plug or tweak the threads.
The tools you will need are:
- A socket wrench and the appropriate sockets
- A small oil filter wrench
- A drain pan to catch the old oil
- Shop rags or paper towels
- A funnel that fits your oil fill hole
- A torque wrench (optional)
Drain the Old Oil
Once you have everything ready, you will need the right size tools, which is mostly a socket of the proper size, and a drain pan to catch the oil that comes out of the motor. You will have enough ground clearance to fit the drain pan under the motor without lifting it, but if you want to jack it up, you can. Just be sure that when you pull the drain plug, you get all of the old oil out. Never use an impact wrench to take off the drain plug or put it back on when you’re done. This can damage the engine.

While you are waiting for all of the old oil to drain out, this is a good time to pull the oil filter off. There will likely be some extra oil trapped in the filter, so be sure to have some shop towels handy to clean things up. A small oil filter wrench will do the job of taking the old filter off rather nicely. When you go to put the new filter on, remember that you don’t want to over-tighten the filter, and it is a good idea to dab a little bit of fresh oil on the oil filter gasket to give it a proper seal.
Once the oil is completely drained out, replace the oil drain plug and tighten to factory torque specs. If you don’t have a torque wrench, you can just get it pretty snug. Remember – do NOT over-tighten the plug. If you’re not sure how tight to make it, get a cheap torque wrench and follow the factory specifications.
Fill ‘er Up
Add new oil through the oil fill location, where your machine has a dipstick. This isn’t like your car, where there is a skinny hole with a long stick. It will be a bigger opening with a threaded cap that has a built-in dipstick. You will need a funnel to avoid making a mess. Add the appropriate amount of oil and check with the dipstick to see if you have it within the proper fill range. There are usually hashmarks on the stick, which will let you know.
Once you have it filled to the line, replace the cap and then start the machine and let it idle up to temperature. Turn off the machine and recheck the oil level. You may need to make a minor adjustment to the amount you have in the engine.
You’re Done!
See? That wasn’t too hard. Even if you’ve never changed your ATV or SxS oil before, it can be done in just a few minutes and then you can get back on the trail. Be sure you dispose of your old oil properly. Many stores have an old oil drop-off service to dispose of it the right way.
Changing your own oil is not difficult and can be done quickly and more cost effectively than having it serviced at a dealership. But keep in mind – if you are unsure about any part of this process, by all means, consult your local dealership for advice or to schedule service. It is always best to err on the side of caution.
 Your Privacy Choices